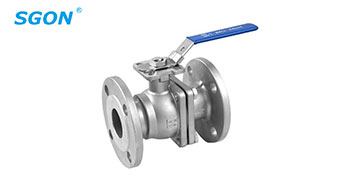
1.Firstly, remove the protective covers on both sides of the flange end and then rinse and clean the valve while it is in a fully open state. This helps to ensure that any debris or contaminants that may have accumulated during storage or transportation are removed, allowing for proper operation.
2.Prior to installation, it is essential to conduct a whole machine test according to the specified signal (either electrical or pneumatic). This test serves to check if the valve has been affected by any vibration during transport and to ensure its performance is intact. Only after passing the test can it be installed in the pipeline. When it comes to electrical installation, make sure to wire it according to the electric actuator circuit diagram to ensure correct functionality.
3.Before connecting the valve to the pipe, thoroughly rinse and clean the pipe to eliminate any remaining impurities. These impurities, if left, could potentially damage the valve seat and the ball, leading to leaks or malfunction.
4.During the installation process, it is crucial not to use the actuator part of the valve as a lifting point. The actuator is a sensitive component, and using it for lifting can cause damage to both the actuator itself and its associated accessories, thereby affecting the overall performance and lifespan of the valve.
5. type of flange ball valve should be installed either in the horizontal or vertical direction of the pipe. The correct orientation is vital for proper fluid flow and valve operation. Incorrect installation may result in issues such as flow restrictions or improper sealing.
6.The pipe near the installation point must be properly supported. It should not droop or be subjected to external forces. To achieve this, pipe brackets or supports can be used to maintain the alignment and stability of the pipeline. Any deviation in the pipeline can cause stress on the valve and its connections, leading to potential leaks or failures.
7.After connecting the valve to the pipe, use the specified torque to cross-lock the flange connecting bolts. This ensures a tight and secure connection, preventing any leakage at the flange joint. The proper torque is determined based on the size and specifications of the valve and the pipe, and following this guideline is crucial for the long-term reliability of the installation.

GET A QUOTE